How to make a budding & half-bloom Kawasaki rose(page 17) |
|
|
31. Gently press the center so that it is completely flat.
You are now ready to form the shape of the Kawasaki rose flower. |

|
|
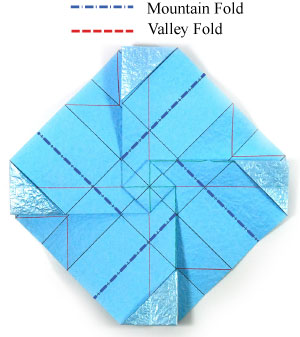
31A. Impotant notice:
The picture on the left is the folding map for the so called "qudrant folding" of the steps #33-38.
If you will be puzzled at those steps, you can come back to this folding map and apply four mountain folds.
Then you will get the step 40 right away.
By studying this mountain-folding on the four blue dotted dash-lines, you can figure out what the alignment of the negative-y and x axes really mean. |
|
|
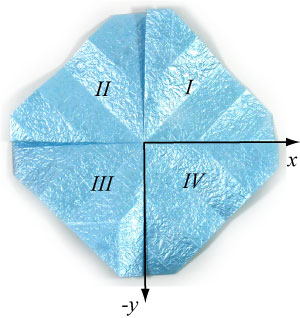
32. Turn the paper the over.
Now, the paper has four quadrants.
Try to imagine that the x-axis is attached to the edge of quadrant IV and the negative y-axis to the edge of quadrant III. |
If you have a difficulty in these steps, you are welcome to write a question below. blog comments powered by Disqus
How To Make A Budding & Half-bloom Kawasaki Rose
© 2013-2024 origami-flower.org All Rights Reserved